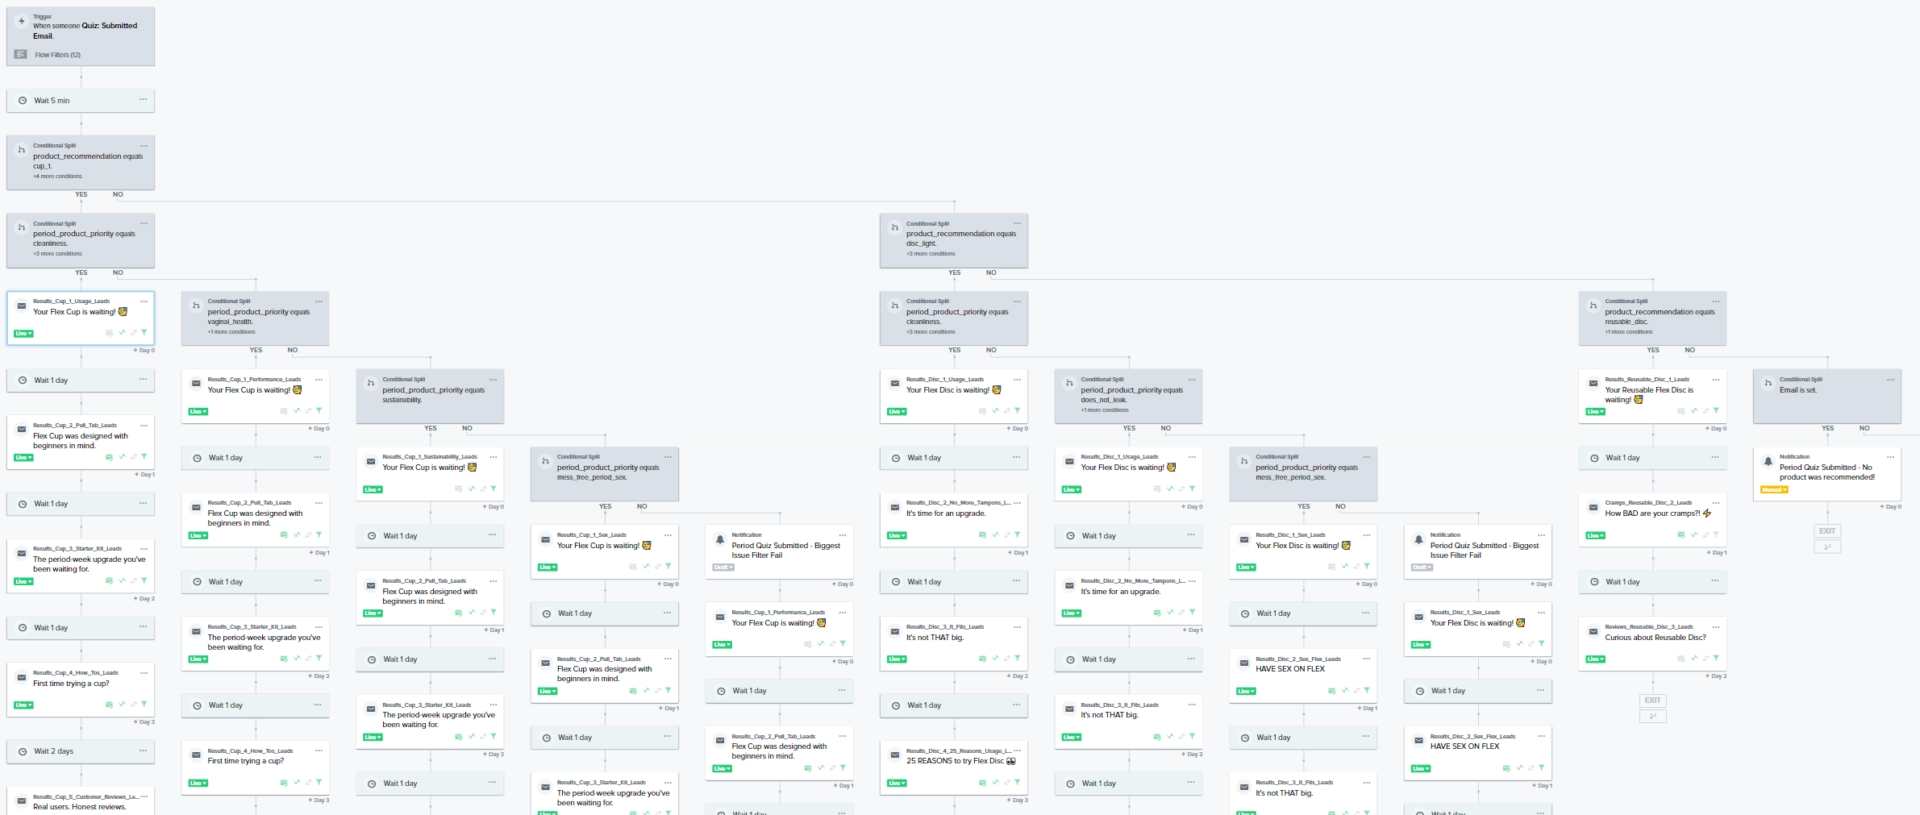
Klaviyo’s flow branching capabilities make it a powerful tool to personalize email and SMS flows for a variety of uses. With custom attributes, custom event properties, and filters available, we can create flows with incredibly complex user journeys and steps. This functionality is great for personalization and sending messages to the right audience at the right time. However, it can also make our flows susceptible to breaking or QA issues where the wrong people are being sent messages or skipped altogether for a handful of reasons. We all want to create ‘set and forget’ Klaviyo flows that we never have to look at and update, but we also need to make sure they continue to work. And as we create more and more flows along a user journey, it can be time consuming to constantly check in on every single flow to do proper QA. With Klaviyo Flow Notification Steps, we can get some help in making sure our flows are working properly.
What are Klaviyo Flow Notification Steps for?
Klaviyo originally created Notification Steps for communicating with internal team members or partners about new VIP subscribers, high value shopping carts or purchases, and for customer service follow ups. These notifications can be configured to send a simple text based email to address that you want (assuming they accept the notification confirmation), and can also leverage personalization like the email address of the user that triggered the notification step.
You can read about more of their traditional use cases here.

While these are nice to have for e-commerce companies with wholesale divisions or high-touch sales relationships, these types of notifications aren’t all that helpful your standard e-commerce store selling apparel or other products at lower price points. However, we can leverage these notification emails for a different purpose.
How to use Flow Notification Steps for QA and Alerts
Because we have the ability to send emails to ourselves when a subscriber moves down a particular path of a flow, we can set up our flows to create fallback or default paths for users as long as we explicitly define the paths we normally want them to go down.
Let’s take an example of a increasingly popular flow configuration that a lot of our clients use:
Using a multi-question quiz to get users to sign up for your email list by recommending them products.
Our client Flex uses a quiz to introduce their leads to their products and recommends one based on what they have previously used, what their biggest problems are as a consumer, and educates them about how Flex solves their problems. The quiz is a big part of their lead capture efforts, has 9 total steps, and is constantly being tweaked with testing to determine what works the best.

We use certain quiz answers to both recommend products and surface personalized content in the form of email. All of these factors can make the corresponding email flow to drive conversions quite complex (to say the least).

Taking a closer look at the branching, we can see that we have multiple branches set up on a handful of different custom attributes. If these attributes make it into Klaviyo as we anticipated when we set the flow up from the beginning, we wouldn’t have a problem. But every marketer who has worked with product and development teams can tell you that marketing can often be the last to know of any changes (if they’re proactively told about said changes at all).

In Flex’s case, their team does a lot of experimentation on the advertising side with their quiz, creating and testing different variations. Testing and experimentation would be slowed down tremendously if we needed to be aware of every single test the advertising and development teams were running. That being said, we still want to personalize the messaging for the majority of leads they capture in the quiz. In addition, we do need to be notified when something flat out isn’t working or has changed that failed to be communicated (this can happen frequently in large cross-functional teams).
That’s where our flow notifications come in.
Step 1. Create a fallback messaging in your flow branch steps.
Before you even set up your notification steps, you first want to organize your flow branches to handle a situation we aren’t anticipating. While you’ve definitely never goofed up some flow logic (😉), you at least want some messaging in place to handle as many subscribers as you theoretically can using a catch-all branch with more standardized/generic messaging. This way, you know subscribers are at least getting baseline messaging while you sort through any issues or decide to create additional branches and content for a new segment or cohort.
When you configure the branching, it’s best to set up your logic as such:
If Explicitly Condition A
branch
If Explicitly Condition B
branch
If Explicitly condition C
branch
Everything Else
You want to set up the catch-all as the last ‘No’ path after checking all the prior explicit conditions you’re looking for. All the subscribers who are unaccounted for are will be captured in the last branch path and not spread across multiple branches.
Step 2. Create and configure your notification at the beginning of the default branch.
Creating the notifications is quite simple. There are a few details you may want to include in each one.
- Send it to yourself and anyone else who should be in a position to make decisions or edits to your flows. In the screenshot below, you can see we’re sending it to two account stakeholders on our team.
- Dynamically pass the email address of the subscriber who went down the default path. It’s helpful to look at their subscriber event history to get a paper trail of what led them down this path as you attempt to fix any issues.
- Jot down the basics of what’s happening with the subscriber in a simple ‘user story’ format. If you happen to receive one of these notifications 3 months from now, that basic context will get you back into problem solving mode more quickly.
- Drop a link to the flow to make it easy to find and troubleshoot.
- Surface the actual property you built the branching on for that subscriber to understand:
- Is it formatted improperly even if your logic is right?
- Is it completely blank?
- Is it a property that’s new or entirely unexpected?
It’ll look something like this:

Step 3. Manage the notifications and implement fixes when the flow is live.
When you first turn on a flow and set your default branches, you may find you’ve overlooked some conditions early on in setting up the flow and you’ll start to get immediate email alerts. That’s ok!
While you’re fixing that issue, you may want to turn the notification step to manual or draft so that your inbox doesn’t get slammed with alerts. Just be sure to turn it back to live when you’ve implemented the fix and confirmed it is working.
In some cases, you may find that there are some edge cases down the road that trigger an alert, but don’t warrant fixing or changing anything in the flow. But if you continue to get bombarded with alerts in quick succession, it should be an indicator that you probably need to make an adjustment.
Takeaways
Not every flow issue is going to be solved by setting up these notifications, but by getting alerted to them early, you have a much greater chance of avoiding the disaster of not seeing that a flow hasn’t been working as intended for an extended period of time. These flow notifications aren’t likely to help you in the case that all of a sudden no one is going through the flows because a trigger event broke. But, you’ll be able to work in Klaviyo with more peace of mind and without having to constantly evaluate every branch of your flows, and it’ll help smooth out any communication disconnects between your marketing team and product or engineering teams piping information into Klaviyo.
Need help keeping track of your Klaviyo flows or taking them to the next level?

